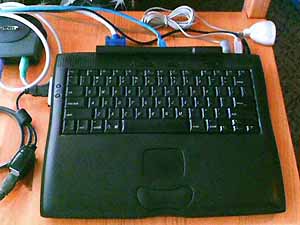
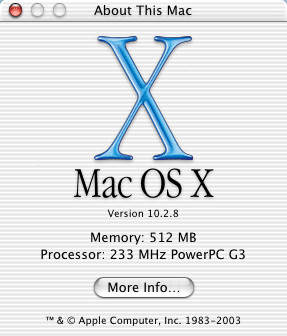
As I previously boasted, I am the proud owner of a PowerBook G3 Series laptop (v2, “PDQ”, released September 1998). Since I wrote that article, I have repaired the hinges and maxed out the RAM to 512 MB.
I had upgraded the hard drive several times from the original 2 GB drive. Each drive upgrade dramatically decreased load-times and noise. I did not encounter any incompatibility problems (such as the rumoured ATA-6 drive problem).
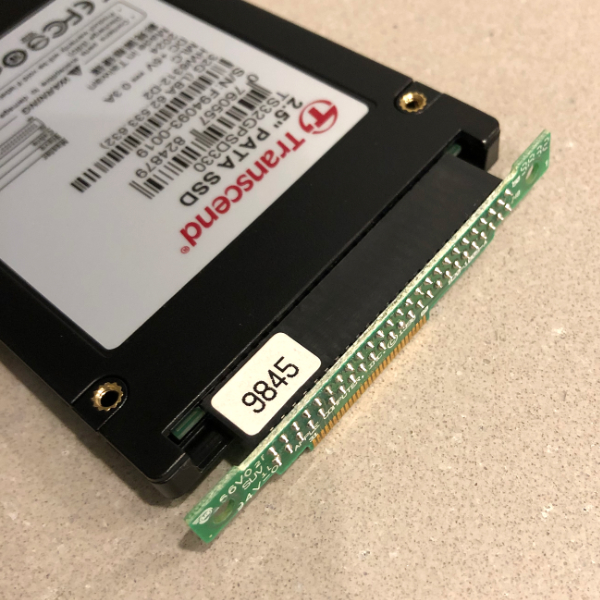
A couple of months ago I decided that the time had come to replace the HDD with an SSD (for fun). So I ordered a 32 GB Transcend PSD330 IDE SSD from the US and waited excitedly for it to arrive. But once I had it installed, my excitement turned to disappointment. The SSD would not boot!
Drive Setup in OS 9 identified the drive as ID-1, i.e. slave in IDE. I know that the designations of slave and master do not necessarily imply any kind of order, that neither designation is necessarily first or higher (or as some believe—faster). So the designation of 1 should not have mattered. Furthermore, the internal 50-pin connector for the drive covers the jumper pins, disallowing the setting of a drive to slave, master, or cable select. I had imagined that this allows the computer to enforce cable select, allowing it to manage the available drives (perhaps the same connector was used elsewhere, where more than one drive may exist on the bus). In the image below, the jumper pins are covered by the left side of the connector, below the “9845” label.
It turns out that the connector does nothing with the jumper pins. The decision to cover the jumpers must have been either economic, that 50-pin connectors were cheaper than 44-pin, or it was to eliminate assembly errors, it is easier to misalign a 44-pin connector where there is space for a 50-pin connector.
Once I began to suspect the master-slave setting, I searched online and found this 2003 article from Chris Breen. In it he says:
“Unlike hard drives intended for desktop computers, drives intended for laptops are always sold configured with master jumper settings—so you needn’t worry about them.”
This implies that the setting of master is important. And indeed, it turned out to be true. In order for a drive to boot in a PowerBook G3 Series (Sept 1998) the drive must be set to master. This was a seemingly crazy decision on the part of Apple, especially considering there can only ever be one drive on that particular bus (the expansion bays operate on a second bus). Yes, perhaps search ID-0 first for a boot sector. But why not then look to ID-1?
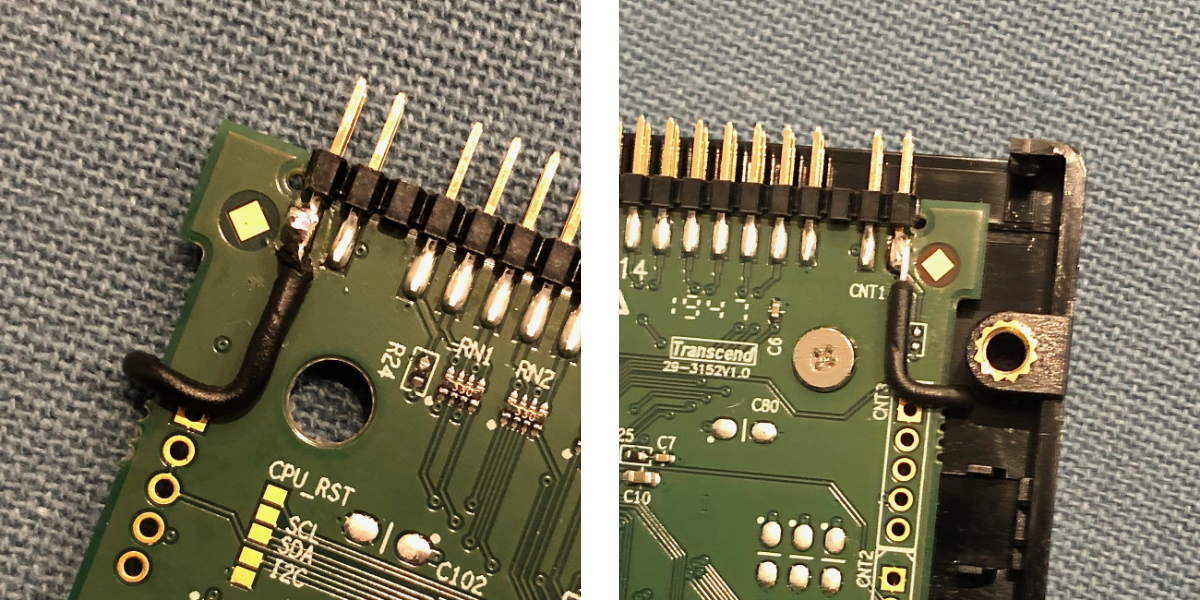
Comparing the labels on the outgoing and incoming drives showed the default master-slave settings to be different. The above quote from Chris Breen is no longer true (probably since 2.5-inch drives are now used in desktop systems). I needed to set jumper pins on a system where I could not set jumper pins!

Being the owner of a soldering iron and knowing that 2.5-inch SSDs are mostly empty space, I opened the drive with a guitar pick to find that there was enough space to internally wire the outermost pins together. I used prototyping wire so that it would hold its shape and avoid any chance of the wire being pinched by the nearby screw hole (and it looks rather neat).
Once I powered on the computer, my previously restored OS 9 installation booted without issue. The ATA-2 bus has a max theoretical speed of 16.7 MB/s that was easily being exceeded by the previous drive; so the increase in speed due to latency alone isn’t as dramatic as I’d hoped for, but is welcome nonetheless. The silent running of this old computer seems strange, but is also welcome.
I installed Mac OS 10.4 Tiger using OWC’s XPostFacto. 10.4 appears to work better than 10.2 on the PDQ. Most notably the 10.2 backlight bug is no more. The only thing broken by 10.4 is the brightness rocker (which I never used anyway). Additionally, screen sleep has the same issue as it does in 10.2, where it only switches off the fluorescent backlight and not the LCD filters. I counter this by setting the screen saver to display a white 1024×768 image a minute before display sleep. As of the time of writing, the Mac OS 10.4 update servers are still online, which is kind of nice. (Of course, 10.4 itself is terribly out-of-date!)

The only difficulty I have now is finding CD-R’s in 2020 of high enough quality to be read by the optical drive!
If you’ve got any questions, don’t hesitate to ask.